Make Your iOS App Pop With Animated Gradients

Do you want to make your app’s design jump out and grab your users’ attention? With animated gradients in your Swift iOS app you can create subtle, dynamic and eye-catching user interfaces – but many developers find Core Animation hard to master.
If that’s you then fear not: this tutorial will teach you how to animate a CAGradientLayer with Swift sample code so your iOS app will look visually stunning.
Use Core Animation, not Core Graphics!
In this tutorial we’ll be using CAGradientLayer, which is a cornerstone class of Core Animation and the simplest and most efficient way of producing beautiful gradients on iOS. You can easily animate all the parameters of your gradient layers, and because it’s based on Core Animation, once you’ve set it up you can “fire and forget.”
If you tried to do the same thing with Core Graphics you’d continually have to re-render the gradient in the view’s drawRect method. The code would be much more complex – and probably perform worse, too!
Readers unfamiliar with CAGradientLayer, or who just need a refresher, should first read my introduction first.
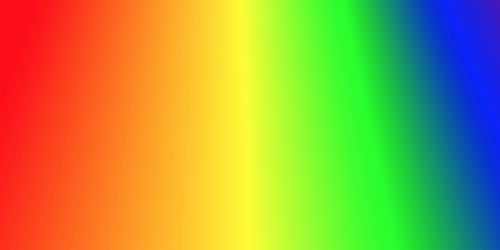
Below is a clip of the animation you will produce at the end of this tutorial. It’s only a few lines of code, extremely easy to extend and customise, and as you can see, animated gradients can add real impact to your project. The Swift sample code in this tutorial is all very short and easy to understand.
A Simple Animated Gradient
First I’m going to show you how easily you can create a simple (albeit ugly) animated gradient.
We will set up a full screen red/green gradient and animate its gradient stops to slide up and down the screen forever. This is what it looks like:-

This is achieved with the sample code below.
import UIKit
class ViewController: UIViewController {

    override func viewDidLoad() {
        super.viewDidLoad()

        // create the gradient layer
        let gradient = CAGradientLayer()
        gradient.frame = self.view.bounds
        gradient.colors = [UIColor.red.cgColor, UIColor.green.cgColor]
        gradient.locations =  [0.0, 0.25]

        // set up the animation
        let animation = CABasicAnimation(keyPath: "locations")
        animation.fromValue = [0.0, 0.25]
        animation.toValue = [0.75, 1.0]
        animation.duration = 2.0
        animation.autoreverses = true
        animation.repeatCount = Float.infinity

        // add the animation to the gradient
        gradient.add(animation, forKey: nil)

        // add the gradient to the view
        self.view.layer.addSublayer(gradient)
    }
}
Let’s walk through it.
The first fragment simply creates the gradient layer.
        let gradient = CAGradientLayer()
        gradient.frame = self.view.bounds
        gradient.colors = [UIColor.red.cgColor, UIColor.green.cgColor]
        gradient.locations =  [0.0, 0.25]
After creating it, we set the gradient’s frame to occupy the entire view, and then we set the start and end colours. We do not set the start or end points, so they default to (0.5, 0.0) and (0.5, 1.0) respectively.
Finally we set the locations array, which specifies the gradient stop locations, which can be thought of as the relative “anchor” points for each colour in the colors array. Each entry in the locations array is between 0 and 1, where 0 equates to the gradient start point and 1 equates to the end point. If not set, the locations would default to 0 and 1 for a two-stop array. Instead, we set them to 0.0 and 0.25, which means that rather than being at the bottom of the gradient, the second colour will be anchored only a quarter of the way down the gradient from the top. The overall effect is to compress the gradient, making it look “bunched up” at the top.
The reason we compress the gradient like this is so we can show clearly what happens when we animate the gradient. The animation code looks like this:-
        let animation = CABasicAnimation(keyPath: "locations")
        animation.fromValue = [0.0, 0.25]
        animation.toValue = [0.75, 1.0]
        animation.duration = 2.0
        animation.autoreverses = true
        animation.repeatCount = Float.infinity
The first line says we setting up a Core Animation CABasicAnimation on the locations array of the gradient. Core animation can vary the properties of layers using KVC, or Key Value Coding (read the official Apple Documentation here). For each property you want to animate, you need to provide start and end values for that property, which you pass to the animation via CABasicAnimation‘s toValue and fromValue properties.
A key thing to note about the toValue and fromValue properties is that they can accept non-primitive values, for example structs and arrays. Back in the days of Objective-C the syntax for this was quite obscure, but with Swift it is a lot easier. We simply use the natural type, in this case setting the locations arrays we wish to animate between:-
        animation.fromValue = [0.0, 0.25]
        animation.toValue = [0.75, 1.0]
The next three lines should be fairly self-explanatory. They set the animation’s duration and set it to auto-repeat forever:-
        animation.duration = 2.0
        animation.autoreverses = true
        animation.repeatCount = Float.infinity
More Subtle, Beautiful Animated Gradients
Debugging animated gradients can be tricky because it’s not always clear when they’re not working as expected. The example above was meant to demonstrate the animation process so you can see that the animated gradient is behaving correctly according to the code. It is clearly not going to win any design awards!
Now let’s try something a designer would be more likely to want. The example below interpolates between opposing colours, and sets the gradient stops outside the gradient unit space so all the visible colours are a bit muted.
        let gradient = CAGradientLayer()
        gradient.frame = self.view.bounds
        gradient.startPoint = CGPoint(x:0.0, y:0.5)
        gradient.endPoint = CGPoint(x:1.0, y:0.5)
        gradient.colors = [UIColor.red.cgColor, UIColor.green.cgColor]
        gradient.locations =  [-0.5, 1.5]

        let animation = CABasicAnimation(keyPath: "colors")
        animation.fromValue = [UIColor.red.cgColor, UIColor.green.cgColor]
        animation.toValue = [UIColor.green.cgColor, UIColor.red.cgColor]
        animation.duration = 5.0
        animation.autoreverses = true
        animation.repeatCount = Float.infinity

        gradient.add(animation, forKey: nil)
        self.view.layer.addSublayer(gradient)
This is how I created this effect:-
What You’ve Learnt About Animated Gradients
In this tutorial about animated gradients you’ve learnt how to create a CAGradientLayer, set its starting colours and geometry, and then how to add a CABasicAnimation to it to animate the gradient’s colors property using a keypath. You’ve also seen how to set the animation duration, autoreversal and repeat count properties.


Wow this is amazing work Lee, exactly what I was searching for. Any idea on how to get the animation to start back up after I go to another view and come back to the gradient animated view? Thanks for the blog post btw!
Hi Robert,
Thanks very much for the feedback – glad you found it so useful!
Regarding your problem of the animation stopping after returning from another view controller, the way to handle this is by explicitly removing the animation and the gradient layer when the current view is off-screen, and re-installing it when the view appears again.
There are several hackish ways to do this, but the most correct way I can think of is as follows:-
private var gradient: CAGradientLayer?
override func viewWillAppear(_ animated: Bool) {
super.viewWillAppear(animated)
// install the animated gradient here *instead* of in viewDidLoad()
installAnimatedGradient()
}
override func viewDidDisappear(_ animated: Bool) {
super.viewDidDisappear(animated)
removeAnimatedLayer()
}
func removeAnimatedLayer() {
// remove animations
self.view.layer.removeAllAnimations()
// if there's a gradient installed on the view, remove it
if let gradient = self.gradient {
gradient.removeFromSuperlayer()
self.gradient = nil
}
}
func installAnimatedGradient() {
let gradient = CAGradientLayer()
// ... set up animated gradient as shown in the article
// keep a reference to the gradient layer
self.view.layer.addSublayer(gradient)
}