Arduino vs. Raspberry Pi: 9 Crucial Differences You Need to Know
A lot of newcomers ask which is best: Arduino or Raspberry Pi? There’s no “right” answer to that question. It depends entirely on your needs, because even though they look similar and cost roughly the same, it’s like comparing apples with oranges.
There are a lot of differences between Raspberry Pi and Arduino. No-one has the time to read the detailed specifications for each, so they google “Arduino vs. Raspberry Pi” and read a few bullet points and “listicles” that point out the basic differences.
Most of the time, these articles don’t go into enough detail for their readers to make a considered choice.
With this article I hope to give you enough information to be able to make the right decision. It’s true that many people do end up learning both systems. The money involved is small enough, but there is a significant time investment if you want to get the best from them.
If you’ve only got time to invest in one platform, you want to be confident you’ve chosen the one suitable for your needs.
The Paradox of Choice
There’s a well-known psychological concept called “the paradox of choice”. When faced with too many hotels, or brands of breakfast cereal, people start to stress and agonise that they might be making the wrong choice. Too much choice becomes worse than too little.
In the old days, engineers didn’t have too much choice. There was a limited supply of parts, and they were expensive. Tooling costs were very high, and programming languages were limited. If you’d invested time and money in a particular manufacturer’s tools and software, you used it for everything.
But in this day and age, we have way too much choice. There are just too many technologies to choose from, and many of them are dirt cheap.
Why the Paradox is Common for Arduino vs. Raspberry Pi
Judging by the Google searches on the subject, many people find it hard to choose between Arduino and Raspberry Pi – you’re far from alone!
Why is this?
Probably because at first glance they might appear to do similar things. They’re quite alike in size, appearance and cost. They both have lots of I/O pins. They’re both easy to program with free software.
They both feature prominently in lots of hobbyist and maker projects across the web. There is definitely some crossover in functionality: there are some problems that can be fixed using either platform.
What’s more, the power of some of the more recent Arduino models is increasing, and sometimes the lines are becoming a little blurred, which can make choosing the right board even less straightforward.
It’s important to realise from the outset that both the Arduino and Raspberry Pi are actually device families. There are a handful of different versions of Raspberry Pi, but there are literally dozens – if not hundreds – of versions of Arduino and its clones.
The goal of this article is to equip you with the knowledge you need to make an effective choice between these two platforms. Yes, there are thousands of differences between Arduino and Raspberry Pi. But it’s not those thousands of differences you need to be agonising over.
For most projects there are going to be a handful of major differences, or maybe just a single, big game-changer that swings your decision one way or the other. The first thing you need to do is identify these crucial differences.
But first, I’ll explain what each platform is – and isn’t.
What is an Arduino?
Arduino is a relatively low-powered platform originally based around the Atmel ATmega series of microcontrollers.
According to Wikipedia, the initial aim of the Arduino project was:
to provide a low-cost and easy way for novices and professionals to create devices that interact with their environment using sensors and actuators. Common examples of such devices intended for beginner hobbyists include simple robots, thermostats and motion detectors.
Aimed mainly at hobbyists, it has become widely adopted everywhere from schools and colleges to makers and professional engineers. It makes a great starting point for building an embedded system, whether it’s an experiment, a prototype or even a finished product.
There many ways to get started with Arduino, such as with this official Arduino starter kit with a 170 page book.
One thing that is not always clear to beginners is the branding. There are official Arduino boards, branded “Arduino” or “Genuino”. And then there are a multitude of cheaper, usually Chinese, clones.
But the clones should not really be considered inferior, because the Arduino is an open source design and it is perfectly legal for anyone to create a copy of the board, including the exact hardware, software and pin layout. And the Chinese are able to do it cheaper than anyone else. The only legally dodgy area is when the clones sometimes incorporate fake Arduino/Genuino branding on the board.
And despite what the original project founders would wish, almost no-one makes a distinction between genuine boards and the cheaper Chinese clones. Everyone just calls them all Arduinos.
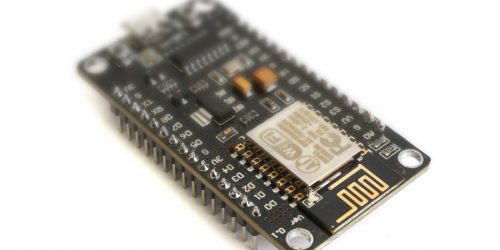
Traditional Atmel-based Arduinos typically have very limited Flash (ROM) and RAM storage, of the order of a few kilobytes, and CPU speeds of 16MHz or less. It has no monitor, keyboard or mouse interface since it’s designed to be an embedded system rather than a desktop computer. Communication is typically via serial interfaces or additional network adapters.
What is a Raspberry Pi
Raspberry Pi (RPi) is a very low-cost, single-board computer (SBC) developed by the Raspberry Pi Foundation, a charity based in Cambridge, UK. It was first released in 2012. The stated purpose of the Foundation is to educate people around the world about computers and programming, which is the primary reason the RPi is so cheap. The initial version sold for $35 but there have been versions released that cost as little as $5.
And as with the Arduino, there are a lot of products and add-on boards available (called “HATS” in Raspberry Pi speak). And given the stated aim of Raspberry Pi as a teaching aid, there are STEM kits aimed at kids with everything they need and more.
Raspberry Pi is a full-blown Linux computer based on an ARM core running at clock speeds in the order of 1GHz and upwards. The ARM core itself is part of an SoC (System-On-Chip). It is the kind of chip you’d find in a smartphone, and it’s at least 100 times more powerful than a basic microcontroller like you’d find in the Arduino.
Here are the 9 Crucial Differences
Here are the crucial differences, listed in what I consider to be a rough order of importance.
I know this might not align exactly with your own priorities, but everyone’s needs are so different and this is a general article to help as many people as possible.
#1: Voltage
You might be surprised to see this as first on the list. But it’s first for a good reason.
If you’re a hobbyist or maker and you’re considering building a hardware system around either Arduino or Raspberry Pi, you might be constrained by what hardware you’re already using (or planning to use). If you have stepper motor drivers or sensors, using I2C interfaces or just digital I/O lines, they will have a specified working voltage, almost certainly 5V or 3.3V.
So it is vitally important that you know the following:-
- The Arduino, being a hobbyist device, operates at 5V.
- The Raspberry Pi, because it’s based on more modern electronics, operates at 3.3V.
Now, it is very important to understand that this means all I/O signals will also be in the range of the operating voltage. An analog or digital input, output, or serial line on the Arduino will operate in the range 0-5V. The same signal from Raspberry Pi will operate in the range 0-3.3V.
What happens if you connect a Raspberry Pi to another chip or module rated at 5V? Well if you’re lucky and the signal is an output, the circuit will not work because the logic high output at 3.3V output cannot drive a logic high input of a 5V device. And if you’re unlucky, the signal is an input and the 5V logic high will cause an over-voltage condition on the 3.3V input of your Raspberry Pi and will very likely permanently damage it.
To convert down from 5V to 3.3V you can use a potential divider, but this is a single direction conversion: it will not work the other way, from 3.3V to 5V. For that you will need more complex circuitry. Alternatively, you can buy bidirectional voltage shifter modules to convert between 3.3V and 5V. These are commonly used to drive I2C signals and the like. But if you have to put one on every I/O line, you’d be much better off re-designing your project to use a common voltage.
#2: Processor
The processor is one of the main differences between the Arduino and the Raspberry Pi.
Now, this may come as a shock, but neither of the processors on the Arduino or the Raspberry Pi is particularly similar to the one in your personal computer.
Arduino Uses a Microcontroller
The Arduino is based around a microcontroller (sometimes called a micro, or MCU). Microcontrollers were first developed in the mid-1970s, hot on the heels of the first microprocessors.
A problem with microprocessors (single-chip CPUs) is that they are useless on their own. They need supporting circuitry and some memory and I/O in order to do anything useful.
Take something like an external computer keyboard. It likely spends well over 99% of its time doing exactly nothing. Its job is complex enough to warrant some kind of internal processor, so it can handle key mappings, caps lock, autorepeat, etc, but it should probably be quite low powered.
But basing a keyboard around a raw microprocessor would be too expensive. The RAM and ROM chips, plus the supporting circuitry, would multiply the cost upwards.
The answer is a microcontroller. It is a low-powered CPU with RAM, ROM, I/O and other supporting circuitry built-in. Although they vary greatly in power and abilities, the primary design goal of a microcontroller is ease of integration – that is, it must be easy to build an embedded system around it, with minimal external electronics.
Raspberry Pi is SoC-Based
Raspberry Pi is based around a system-on-chip (SoC).
A SoC (system-on-chip) is a modern chip package containing almost an entire computer. Beginning in the 1990s, the history of the SoC is deeply tied into the development of the mobile (cellular) phone.
A prime mover in the SoC industry was Cambridge, UK-based ARM who licensed their extremely power-efficient CPU designs to other companies to integrate onto custom silicon. As a result, the vast majority of SoC implementations feature one or more ARM cores. It is also common that they include other processing engines such DSP and GPU cores. Alongside the processors, a typical SoC also features significant RAM, as well as networking and other I/O functions.
The classic use case for a modern SoC is a smartphone. Because it has to run an advanced operating system as well as multiple apps, displaying advanced graphics on a high-resolution screen. Clearly, this is a compute-intensive task. And aside from the stuff the user can see, the smartphone must also perform a lot of work in the background running 3G/4G, wifi and bluetooth communication stacks. It may have to play music in the background, and be able to record HD video. It must do all of this running on a battery, so it should be able to turn off entire subsystems frequently in order to be able to save valuable power.
How to Compare Microcontrollers and SoCs
Remember in the introduction when I said comparing Arduino and Raspberry Pi is like comparing apples and oranges? This is the main reason why.
Microcontrollers are quite an old technology, much simpler than a SoC. They are relatively easy to program if you need to run an embedded device to perform a single task using some specialised hardware.
SoCs are far more complex, and very difficult to program from scratch. However, since the Raspberry Pi has an operating system running on the chip, you will almost certainly not be programming the chip directly on the “bare metal”. In fact, it can actually be much easier to program than the Arduino because you can run your code from with in a GUI or on the command line.
You can find out more about the differences between microcontrollers and SoCs in this article.
Which brings us nicely to…
#3: Operating System
This is arguably just as important as the processor. It is one of those crucial determining factors, like voltage, which can almost make the decision for you.
Arduino Runs On Bare Metal
When you program the Arduino your code is running on the “bare metal” – in other words, there is no operating system between your code and the hardware. Your code resides in the flash ROM inside the microcontroller and starts running immediately on power-up – there is no boot sequence.
The Arduino is a almost raw piece of hardware. It does include a very small built-in program called a bootloader, whose sole purpose is to allow you to download code from a host computer, via USB, to the flash ROM. Without the bootloader you’d need to use an in-circuit system programmer (ISP or ICSP), which isn’t expensive, but being able to program the Arduino directly via USB is certainly convenient.
Once detached from the USB, then every time it is powered up the Arduino will just run the last code you programmed into flash ROM.There are no OS updates to worry about. Well-written code can run for years like this – and theoretically forever.
Raspberry Pi Runs a Full-Blown Operating System
The story with Raspberry Pi is radically different. It is far more akin to running a program on your desktop or laptop computer. You can run many different operating systems, but the vast majority are variants of Linux. Here are some of the most popular in use:-
- Raspbian, a Debian variant tailor-made for Raspberry Pi
- Several Ubuntu variants
- Pidora, a Fedora variant
- Arch Linux ARM
- Kali Linux, the security research distro.
Of that list, Raspbian is the most popular because it is the “official” distribution for the platform. Kali Linux is very popular among security researchers (and presumably less ethical people) because it allows a full Kali installation on a small, portable device.
When powered up, the Raspberry Pi goes through a fairly long boot sequence as it loads its operating system. Depending on how it is configured, it will either boot to a full GUI desktop or a command shell. It can also be run “headless”, i.e with no keyboard or monitor attached. In this mode you access it via a network, for example using an SSH session from another computer.
Running a program is therefore no different to on a regular computer: you launch the program using a desktop icon or via the command line.
If the Raspberry Pi is installed in an embedded system or in some remote location, you may need to configure it to run your code after boot. You’d do that the same as on any other Linux OS, by adding it to /etc/init.d (or whatever the distro requires).
#4 Real-Time Considerations
This is closely related to the operating system discussion above, but involves a different set of decisions when making the choice between Arduino and Raspberry Pi. Just because you decide you do or do not need an OS, the question of real-time operation still needs to be considered.
Real-time applications are often broken down into three groups: hard real-time, firm real-time and soft real-time.
Hard real-time systems must be able to execute code within guaranteed time constraints. They include things such as:-
- military applications
- critical medical applications (life support systems, pacemakers)
- aircraft
- nuclear power stations
Most of these systems are heavily quality controlled and not programmed by hobbyists!
There are a few hobbyist applications that do qualify as hard real time, most commonly machines in flight such as drones, some robotics applications, and devices such as 3D printers.
Soft real-time applications typically include things such as telemetry and monitoring of relatively slow or non-critical events such as weather information or stock market data. Graphics rendering which is allowed to slow down if the rest of the system gets too busy.
Firm real-time applications occupy the grey area in between, where if code is not executed within a guaranteed time there may be some kind of failure but it’s not considered catastrophic. This includes applications such as:-
- Non-critical robotics where failure cannot not result in harm to a person, or be too expensive
- Mobile phone (and other wireless) baseband processors which need to transmit/receive within a given time window, but failure is recoverable (for instance, by skipping frames or re-transmission)
- Communication and multimedia systems where encoding/decoding should occur within a given time window, but failure is recoverable (for instance, by skipping frames or lowering the bandwidth)
How This Affects Your Decision
It’s imperative you understand whether your application is actually hard real-time or not. Often people assume their system is hard real-time when it’s just firm real-time.
A “standard” Linux-based OS such as Raspbian is not designed for real-time operation. As stated above, true real-time systems must be able to execute code within guaranteed time constraints, and the Unix-based scheduler does not provide that level of certainty. This makes Raspberry Pi unsuitable for hard real-time applications, and less effective for firm real-time applications.
There’s a special type of operating system called a real time operating system (RTOS) for exactly this purpose. Of course, people have ported RTOSes to Raspberry Pi, so if you know you absolutely need hard real-time operation it would be worth considering one of these.
Arduino, by contrast, is perfect for hard real-time operations because your application code is the only code running on the processor. There are no unexpected delays and bug-free code will run exactly when it should. The only things that can interrupt your code are, well, interrupts, but when implemented properly, they should impose minimal latency on the overall system. That’s one very good reason why Arduinos (and microcontrollers in general) are often used for robotics and control systems.
#5 Programming
Programming comes a fair way down the list because a programmer should be able to use whatever language is best for the job rather than choosing a language and trying to make the rest of the system fit around it.
Some people, upon reading that Python or Node.js can run on the Raspberry Pi, would prematurely decide upon that platform based on that fact alone. I hope the discussion above has steered you away from doing that.
That said, the programming language you use is important because all languages have their strengths and weaknesses. In addition, you may be performing tasks on the Arduino and Raspberry Pi platforms that you have not done on other systems, so it’s worth understanding your options here.
Arduino: C, C++ or Assembler, Your Choice!
There are three obvious ways to program Arduino, from easiest to hardest:-
- From the Arduino IDE, using its own C++ -like language
- Using a regular C/C++ compiler
- Using assembler
(Actually, there’s theoretically no reason you can’t use any another compiled programming language, such as Rust or Ada, but that’s quite an advanced procedure and you’d no doubt encounter all sorts of problems getting the code to link and run properly.)
Most people starting out with Arduino use the IDE. The language it uses is basically C++ but bundled with some built-in libraries to make it easier to get started. It’s perfect for anyone familiar with C-like syntax and object oriented programming. It can be written, compiled and downloaded (or “flashed”) to the Arduino from within the IDE.
The IDE provides built-in libraries for driving I/O lines and the common peripherals on the Atmel MCU. This makes it easy to get started.
Be aware, however, the Arduino IDE does not offer any debugging tools other than a serial port monitor. For debugging, most people use LEDs and/or a serial port to output debugging messages. This can present challenges when trying to find difficult bugs.
Furthermore, Arduino doesn’t offer any options for someone who has never used any C-based language (or assembler). That said, if you’re wanting to learn to program embedded systems you’re going to have to learn C at some point, so the investment would be well worth it.
Raspberry Pi: the Sky’s the Limit!
Raspberry Pi, on the other hand, when running a Linux-based OS, can be programmed in any language you like! The main thing to be aware of is that if you need to perform custom hardware I/O then you need to ensure your chosen language has appropriate I/O libraries compatible with the ARM architecture.
A default installation of the Raspbian OS comes with the following languages already installed:-
- C
- C++
- Python
- Perl
- Scratch (GUI only)
- awk
- bash (shell scripting)
Python already has its package manager, pip, installed, so it is easily to install new packages such as NumPy and SciPy. In addition, the following languages are very popular and can easily be installed:-
- Java
- Node.js & npm
- PHP
- Ruby
If installing binaries rather than source, just be sure to install the ARM version rather than the Intel (x86/x64). There are several possible ARM versions (ARMv6, ARMv7 and ARMv8), and the one you need depends on your exact Raspberry Pi model. You can find out which you need by opening the command line shell in the Raspberry Pi and typing:-
$ uname -m
This will tell you which arm version your system is.
#6: RAM
The two platforms have very different RAM capacity.
The Raspberry Pi has between 256MB and 1GB, depending on the exact model. As you might expect, the newer models have the higher quantities. Unless you’re performing some particularly memory-intensive processing, you’re unlikely to run out of memory on the Raspberry Pi.
At the other end of the scale, the RAM available on the Arduino platform could easily become a deal-breaker. The Atmel-based Arduinos typically have 2K-8K of RAM. That’s an average of 128 times less than the Raspberry Pi models. Writing code that works in only 2K can be a challenge, especially if you’re never developed for such devices before. However, when working on the bare metal it’s surprising how much can be achieved with such a small amount of RAM.
When coding on regular computer, constant data such as strings, tables, and so on would be stored in RAM. This approach is a bad idea with Arduino, because RAM is scarce. Constant data should be moved to flash ROM. You can do this at compile time using special directives in the source code.
#7: Storage
The storage model of the Arduino and Raspberry Pi are very different.
The Raspberry Pi’s SoC processor has no on-board storage, and instead relies on an external SD card to act like a hard drive. An SD card is flash ROM, so it’s usually slower than a hard drive.
Because it works just like a regular computer, programs stored on the SD card are copied into RAM before they’re run. So once a program is in RAM, the speed of the SD card is not an issue. There are also several levels of cache inside the SoC, so the program will actually run extremely fast. Also, any files written back to the SD card will be buffered via cache and RAM, so the flash ROM speed will not normally become a bottleneck.
The Arduino has a completely different storage architecture. All program code must be stored in the MCU’s internal flash ROM. The Atmel chips have a so-called Harvard architecture, which means they have separate program and data buses. The upshot of this is that program code is stored in flash ROM and data is stored in RAM. Data cannot be written to flash memory, so the stored program cannot be modified and the flash cannot be used like a file system.
The exception to this is a small area of EEPROM (which is similar to flash) on the data bus that can be used to store a small amount of persistent data between power cycles.
#8 Networking
The Raspberry Pi also has an ethernet port, which might be critical for some applications. Some of the recent versions have WiFi. This makes it very easy to build a web server or any other internet-enabled device using a Raspberry Pi.
The Arduino has no native TCP/IP networking, but of course, you can buy ethernet and Wifi expander boards (called “shields” in Arduino parlance). There are also libraries that make setting up web servers straightforward, but doing anything advanced would be fairly involved. And obviously the Arduino cannot deal with large quantities of data because RAM is too scarce for any serious buffering.
Because Raspberry Pi has a full Linux OS then all the networking software, including the TCP/IP stack and common networking tools are already available. You can run LAMP stacks, ngrok, Flask servers, Node.js servers, anything you like. This means Raspberry Pi is the clear winner for networking.
#9: I/O Features
Both platforms sport a range of I/O ports. The bigger Arduinos and the Raspberry Pi have a similar number of I/O lines. They both have many digital I/O pins, some of which can be used in pulse-width modulation (PWM) mode. Both also feature multiple serial ports including I2C, SPI and UART.
The Arduino has the upper hand for hardware interfacing because it has analog-to-digital converter (ADC) inputs, which are lacking on the Raspberry Pi. It also has more PWM outputs.
They both have USB ports but the Raspberry Pi has more. The single USB port on the Arduino is a USB slave that functions as a serial port, whereas the Raspberry Pi’s are proper USB ports that you can plug USB peripherals into.
The Raspberry Pi has both audio and HDMI output, so for multimedia applications it clearly wins hands-down.
All of that said, I/O should not really be much of an issue in deciding between the two platforms because you can buy cheap expansion boards with just about any hardware peripheral for either Raspberry Pi or Arduino. Just be sure to choose the correct voltage!
Conclusion
That was a long haul – if you made it this far, well done!
I hope you were able to identify the important factors to help you decide which platform is best for your project. I’d guess there are very few people who’ve read the article in full who have not been tipped one way or the other by at least one of the points above.
Now it’s a case of sitting down and working out which of the differences matter to you the most. This could be a question of cost, or time, or skills. You just need to identify which one, and then your decision is made!
Stay in Touch
I’d love to hear from you about your projects, or any suggestions about improvements to this article. Please leave a comment below or join the mailing list to keep up-to-date with my latest articles.