Introduction to IoT: Build an MQTT Server Using Raspberry Pi

In the fast-changing world of IoT, there’s no such thing as a universal standard. But over the last few years, MQTT has started to establish itself as the de facto messaging protocol. In this tutorial you’ll learn how to set up an MQTT message server in just a few minutes using a Raspberry Pi.
MQTT is a lightweight and simple messaging protocol, making it an ideal starting point for learning home automation and IoT.
In this tutorial you’ll see just how easy it is to set up an MQTT message server (or broker) in just a couple of minutes using a Raspberry Pi. You’ll also see how easily you can test it using another computer or virtual machine.
What is MQTT?
MQTT stands for Message Queuing Telemetry Transport, which sounds scarier than it is. What it boils down to is an easy-to-use and flexible protocol that allows you to send arbitrary messages across a network to any other device that is interested.
MQTT Brokers, Publishers & Subscribers
In a nutshell, MQTT consists of publishers and subscribers, and they’re all connected through a broker.
The terminology can be confusing, but if you translate it into client-server notation, it’s this simple:-
- the broker is the server
- the publishers and subscribers are the clients.
Crucially, there’s no hierarchy between publishers and subscribers. You might expect publishers to be in some way special, but they’re just clients that talk to the server. In fact, a client can be both a publisher and a subscriber at the same time.
Because server is often a more natural word to use, from now on I’ll use the terms broker and server interchangeably. And I’ll continue to use the term client to refer to publishers and subscribers.
MQTT Topics & Messages
There are no client device addresses or identifiers in MQTT, which makes it very easy to build an expansible, ad hoc network. The only thing all clients must know is the address of the server.
You may be wondering how messages get routed between publishers and subscribers. The answer is very simple: topics and messages.
Publishers send messages on a topic. Topics are kind of like channels. For example, a publisher might send a message temp: 22.5 on a topic heating/thermostat/living-room.
Subscribers listen to a topic. So all subscribers that were listening to the topic heating/thermostat/living-room would receive the message temp: 22.5.
And that’s basically it! There’s really not much more, and it’s certainly enough to get started building your first MQTT broker.
Hosting an MQTT Broker
There are many ways of hosting an MQTT broker. Some of the common places your can host an MQTT broker are:-
- natively on your computer
- inside a virtual machine on your computer
- inside a virtual machine in the cloud
- using a dedicated cloud-based broker
- on a single-board computer
Obviously there are pros and cons to each. Tying up your main desktop or laptop is probably not a great long-term solution, but works well for testing purposes.
Using cloud-based solutions is a great long-term solution but does involve additional complexity because of security implications. That’s something I’ll tackle in another article.
An ideal compromise is to host the broker on a single-board computer.
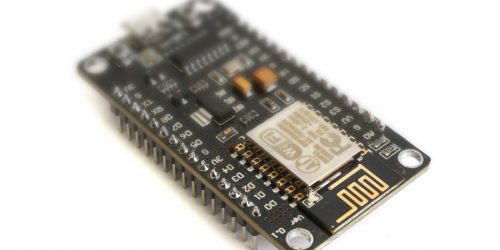
The memory requirements put this task out of the range of a traditional AVR-based Arduino, but it is possible to use a higher-powered board such as an ESP32 or ESP8266 (the NodeMCU form factor is very good, popular, and cheaply available in multi-packs), and I’m sure there are many others that are capable.
There are some situations where hosting the broker on an Arduino-compatible system would make sense, but for most normal use cases it is more straightforward to host it on a full-fledged SBC with plenty of RAM, such as a Raspberry Pi.
Virtually any Pi would do the job, so long as it has a network connection. The Raspberry Pi Zero W is an ideal candidate for a dedicated MQTT broker because it’s small, relatively low-powered and has on-board wifi. Alternatively, if you want the Pi to do other tasks as well, use something with more CPU cores such as the Model 3 B or A+.
Building a Raspberry Pi MQTT Broker
First you need a Raspberry Pi with a recent version of Raspbian or Raspbian Lite installed. You can buy a Raspberry Pi 3 Model B here, which is ideal for the job.
I generally use headless systems so everything I outline here will use the command line. Here’s a complete guide to setting up a headless installation of Raspbian Lite.
If you’re working on a GUI installation, just open Terminal and follow the instructions.
1. Install the mosquitto MQTT Broker
mosquitto is a popular MQTT broker that is well-supported on Debian-based Linux platforms such as Raspbian. It’s easy to install using apt:-
sudo apt install mosquitto mosquitto-clients
You’ll need to enter your password the first time you run sudo.
You don’t strictly need the mosquitto-clients package for running the broker, but installing it allows you to run the MQTT client code locally which is great for testing.
It also means you can use the Raspberry Pi as a proper MQTT client as well as a broker. This means you could, for example, add a user interface to control other MQTT clients around your home directly from the Raspberry Pi.
2. Enable the mosquitto broker
Enable the broker and allow it to auto-start after reboot using the following command:-
sudo systemctl enable mosquitto
The broker should now be running. You can confirm by checking the systemd service status:-
sudo systemctl status mosquitto
This should produce an output similar to:-
● mosquitto.service - LSB: mosquitto MQTT v3.1 message broker
   Loaded: loaded (/etc/init.d/mosquitto; generated; vendor preset: enabled)
   Active: active (running) since Sat 2018-12-29 16:27:56 GMT; 22h ago
     Docs: man:systemd-sysv-generator(8)
   CGroup: /system.slice/mosquitto.service
           └─1685 /usr/sbin/mosquitto -c /etc/mosquitto/mosquitto.conf

Dec 29 16:27:56 raspberrypi systemd[1]: Starting LSB: mosquitto MQTT v3.1 message broker...
Dec 29 16:27:56 raspberrypi mosquitto[1679]: Starting network daemon:: mosquitto.
Dec 29 16:27:56 raspberrypi systemd[1]: Started LSB: mosquitto MQTT v3.1 message broker.
3. Subscribe to the MQTT Topic Locally
In order to test the broker, you need to subscribe to an MQTT topic.
A topic is simply a string that looks like a file system path. It has the general form:-
a/b/c/...
There are no restrictions on the number of elements. There are some special characters: apart from the slash / itself, the characters + and # are wildcards, which you don’t really need to know about yet, other than not to use them in a topic name.
The great thing about MQTT is that you can just make up topics to suit your needs. You don’t need to register them anywhere. For the sake of this test, you can use a topic called test/message.
In the existing terminal, subscribe to the test/message topic:-
mosquitto_sub -h localhost -t "test/message"
This will send a subscription message to the MQTT broker which is currently running on the same system (as specified by the -h localhost option). But it could be running somewhere else, as you’ll see later.
So long as the mosquitto_sub programme is running you’re listening to the test/message topic as an MQTT client.
4. Publish to the MQTT Topic Locally
Because your current terminal is occupied listening to the topic, you’ll need to open another terminal. You can do this using another SSH session or on the Raspbian GUI, depending how your system is configured.
Once open, publish message to the test/message topic like this:-
mosquitto_pub -h localhost -t "test/message" -m "Hello, world"
If you look back at the first terminal now you should see this:-
Hello, world
Congratulations, you have just published your first MQTT message!
Testing from a Different Machine
That’s all very well, but it’s not that useful. The real power of MQTT becomes apparent when you see how easy it is to communicate between different machines.
Later in this series I’ll demonstrate how you can send and receive MQTT messages from devices such as the ESP8266, which is ideal for home automation.
But first it’s useful to learn how to send and receive messages via your Raspberry Pi broker from another computer on the network. This is the ideal test environment because it’s real enough in that the client is a separate machine from the Raspberry Pi, and because it’s a computer rather than an embedded system it’s convenient for testing and debugging.
5. Select a Test Machine
There are plenty of different MQTT clients out there but for simplicity’s sake I’m going to suggest you stick with mosquitto for testing. It has the advantage of being able to run on pretty much everything (see the official download page).
In my opinion, a Linux virtual machine makes a great test platform. You can spin up a lot of terminals and even different VMs to truly exercise your MQTT network. I used Debian 9.6 (Stretch) running in VirtualBox on a Mac very successfully.
But for now, just fire up whatever system you have to perform your first test…
6. Install the MQTT Client Package
Installing mosquitto MQTT Client on Linux
Assuming you’re running on Linux, including a virtual Linux machine, you can install the mosquitto client code using:-
apt update
sudo apt install mosquitto-clients
If your installation doesn’t yet support apt, replace it with apt-get.
Installing mosquitto MQTT Client on macOS
Or if you’re on macOS, there’s no separation between the the broker and client packages, so just use the following to install everything:-
brew update
brew install mosquitto
Installing mosquitto MQTT Client on Windows
Installation and usage on a Windows machine will be different – please see the download link above for more info.
7. Identify the Raspberry Pi on the Network
The MQTT client doesn’t need to know very much about the broker, but it does need to know where it is on the network. The MQTT client code needs a hostname or an IP address whenever you subscribe to or publish a message.
If your Raspberry Pi has a unique name on your network, it makes sense to use that. Find the host name on the Pi by typing:-
hostname
If yours is left at the default it will return:-
raspberrypi
I have too many Raspberry Pis on my network so I called mine mqtt-server to make it unique. If you want to do the same, the easiest way is via sudo raspi-config, but it does require a reboot.
Alternatively, you can always use the Raspberry Pi’s IP address in place of the hostname. An easy way to get this is by running:-
ifconfig | grep inet | grep cast
8. Subscribe to the Topic Remotely
On the test machine, there’s no need to run a server since it’s already running on the Raspberry Pi.
You can just subscribe to the test message like this:-
mosquitto_sub -h raspberrypi -t "test/message"
If your Raspberry Pi’s hostname is different, substitute it in place of raspberrypi in the above command. You can also use the IP address directly if you prefer:-
mosquitto_sub -h 192.168.0.25 -t "test/message"
This will now cause the terminal to wait for messages from the broker on the topic test/message.
9. Publish a Test Message Remotely
As before, you can now open another terminal window and type:-
mosquitto_pub -h raspberrypi -t "test/message" -m "Hello from remote"
Again, substitute your hostname or IP address as appropriate.
Now you should a message see in the first terminal window:-
Hello from remote
If you still have the subscription terminal open on your Raspberry Pi from step (3) above, you should also see the message appear there.
Conclusion
This tutorial has demonstrated how you can set up a mosquitto MQTT broker on a Raspberry Pi and how you can subscribe and publish messages to it from another machine on the network.
In a forthcoming article I’ll show how you can set up an MQTT client using an ESP8266 device, and perform a useful home automation task.
Thanks for Reading & Get In Touch
Have you made something great with this? I’d love to see your photos and hear your stories. Please send me feedback, either by leaving a comment below or by contacting me directly.
And if you’d like to receive updates about my upcoming projects, please join my mailing list.
You can also follow me on Twitter.


You might be interested in the free tier of Solace’s cloud based message broker that supports MQTT. The free tier Is limited to 50 simultaneous connections, but that is often enough for home use. Being in the cloud makes it easy to create a simple web app to send and receive messages from anywhere. See https://cloud.solace.com/pricing/#starterplans
Disclaimer: I am a dev at Solace, but the service is legit
Note that you can interoperate with REST and AMQP with this too
TYPO : sudo systemctl enable mosquitto
But thanks !
Thank you! Fixed.